
How to get started with your live event
Log in to your TwentyThree account and choose "Live". Here you'll find the complete overview of your active, upcoming and previous live events. You can very easily search for a specific event or even filter the order of events displayed in this overview.
Creating a new event
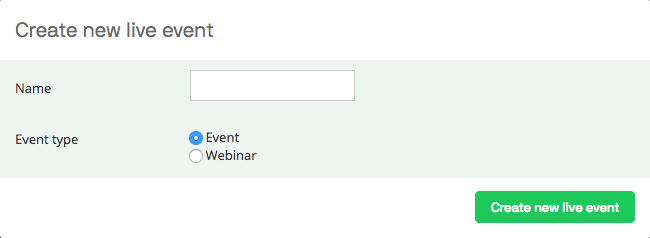
To create a new event, go to Live and click "Create new live event" in the top right corner. You can instantly name the event before clicking on "Create new live event". Once your event is created, you'll be taken to the control panel of the event page, where you can define all event details, build your audience and go live.
1. Define streaming method
Before you go live you'll want to define what streaming method is most suitable for your event. Six options of streaming methods are available; iPhone, Android, Other mobile, computer, webcam and hardware. Read the full article on streaming devices and methods.

2. Opening the live page and sharing the event
Once you have created the live event you can immediately access the live page frontend. To access the page you simply click on the title of the live event next to the preview image.

In order to share or embed the live link you click on the <> where you can either share a link to the live page or get the embed code for the player. As with any other TwentyThree embed code you can choose what player you want to use when sharing, or just use the standard player.
Please note that embedding a live event only means embedding the actual video player. This will include the countdown in the player, but the interactive features such as chat, questions and moments will not be in the player. Also, viewers can only sign up for the event once you start the stream in the embedded player. If you want to activate all of these features we recommend to direct viewers to the live page.
3. Plan and control the event; before, during and after
In the TwentyThree backend you can control all aspects of your live event, your audience and the production part. The settings are grouped in three main stages of an event: before, during and after. This is where you plan out the full event, configure registration options provide a schedule, upload a preview image, posts and moments, chat, questions, analytics, social sharing, recordings and much more.
→ Read all about planning the event
4. Go live and stream to your event
When you've planned the full event you're ready to broadcast. The quickest way to start a broadcast is by iPhone. To start simply click "Start Streaming" in the top right corner to go live.

If you are streaming via your iPhone, this is controlled in the app. Read all about the iOS app here.
If you are streaming from a computer or hardware such as live encoders, you need to go to the streaming tab to find the live server and stream name associated with this live event.

If you want to stream in only one bitrate you can copy paste information from the first box, or you can select multiple bitrate streams where the displayed bitrate is then the maximum bitrate live transcoded. You can also download configuration files to use for each setting that can be uploaded in most live streaming software.
After filling in the server address and stream name you need to start the broadcast in your third party streaming software or live encoder. If the broadcast is successfully initiated the Live button in the live event will switch to green.
5. Stream in preview mode
By default all live events will be configured to automatically send the stream live in the live page and player. However, you can change this setting so the broadcast will be in preview mode instead whenever you start a stream. This can be really helpful when running a live stream from third-party applications as you can start the stream early on site and the control when exactly the broadcast should be shown live to the audience.
In order to configure preview mode for the event, you need to go to plan tab, find "Configure live flow" under the production options and select "No, the video stream should not be available to viewers before we click Go live".

When you now start the broadcast from the iPhone, webcam, hardware or software the button will update to a light blue color indicating that a broadcast signal is received but nothing is being shown to the audience

The live stream can only be seen by clicking the "preview live stream" which will open up a new window with a preview player. When you want to go live to your audience and show the stream in the live event page and embedded player you simply click "Go live now"
Record, edit and publish recording
Click "Record" if you wish to make the content available on-demand immediately after the event. Read more about recordings here. When the event is over make sure to update your event page, create clips and promote the highlights of the event.